Splunk Your Canarytokens

Canarytokens are a free, quick, painless way to help defenders discover they’ve been breached (by having attackers announce themselves.) When triggered, they generate an alert that can be ingested into Splunk to add another layer of visibility to your security monitoring.
Imagine knowing when your website source code has been cloned or notified if an attacker uses a strategically placed “canary” AWS API key. There are many use cases to use Canarytokens for, and today we will walk through setting up a simple token and ingesting the alert into Splunk for further analysis.
Here is an overview of the steps we will take to get started with Canarytokens and Splunk.
- Create an HTTP Event Collector (HEC) token in Splunk.
- Allow authentication via query string in Splunk configuration files.
- Create Canarytoken.
- Visualize results in Splunk.
Create a Splunk HEC token
Perform the following steps to create a new HEC token in Splunk1.
- Navigate to Settings > Data Inputs.
- Click “HTTP Event Collector.”
- In the upper right corner, click “Global Settings.”
- Ensure “All tokens” is set to enabled, and take note of your HTTP port number (default=8088).
- Save and close the global setting and now click “New Token.”
Give the new token a name and click next.
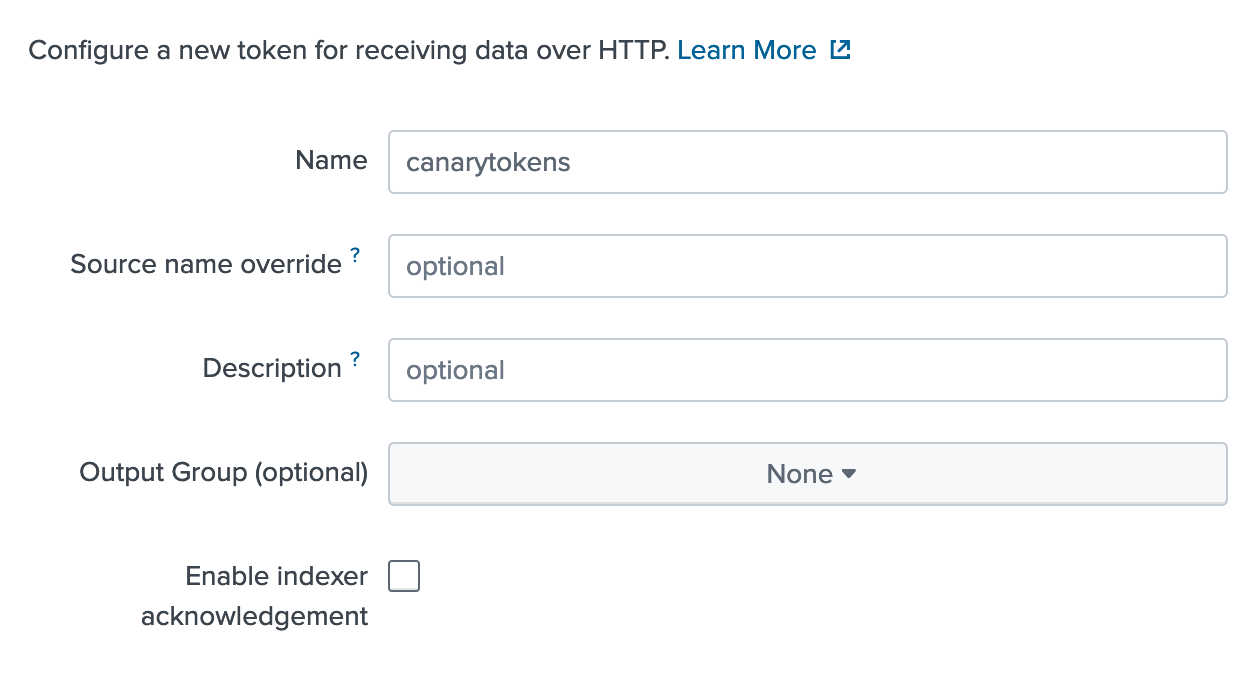 Name the HEC token
For simplicity, set the sourcetype to _json and choose an index to place the data.
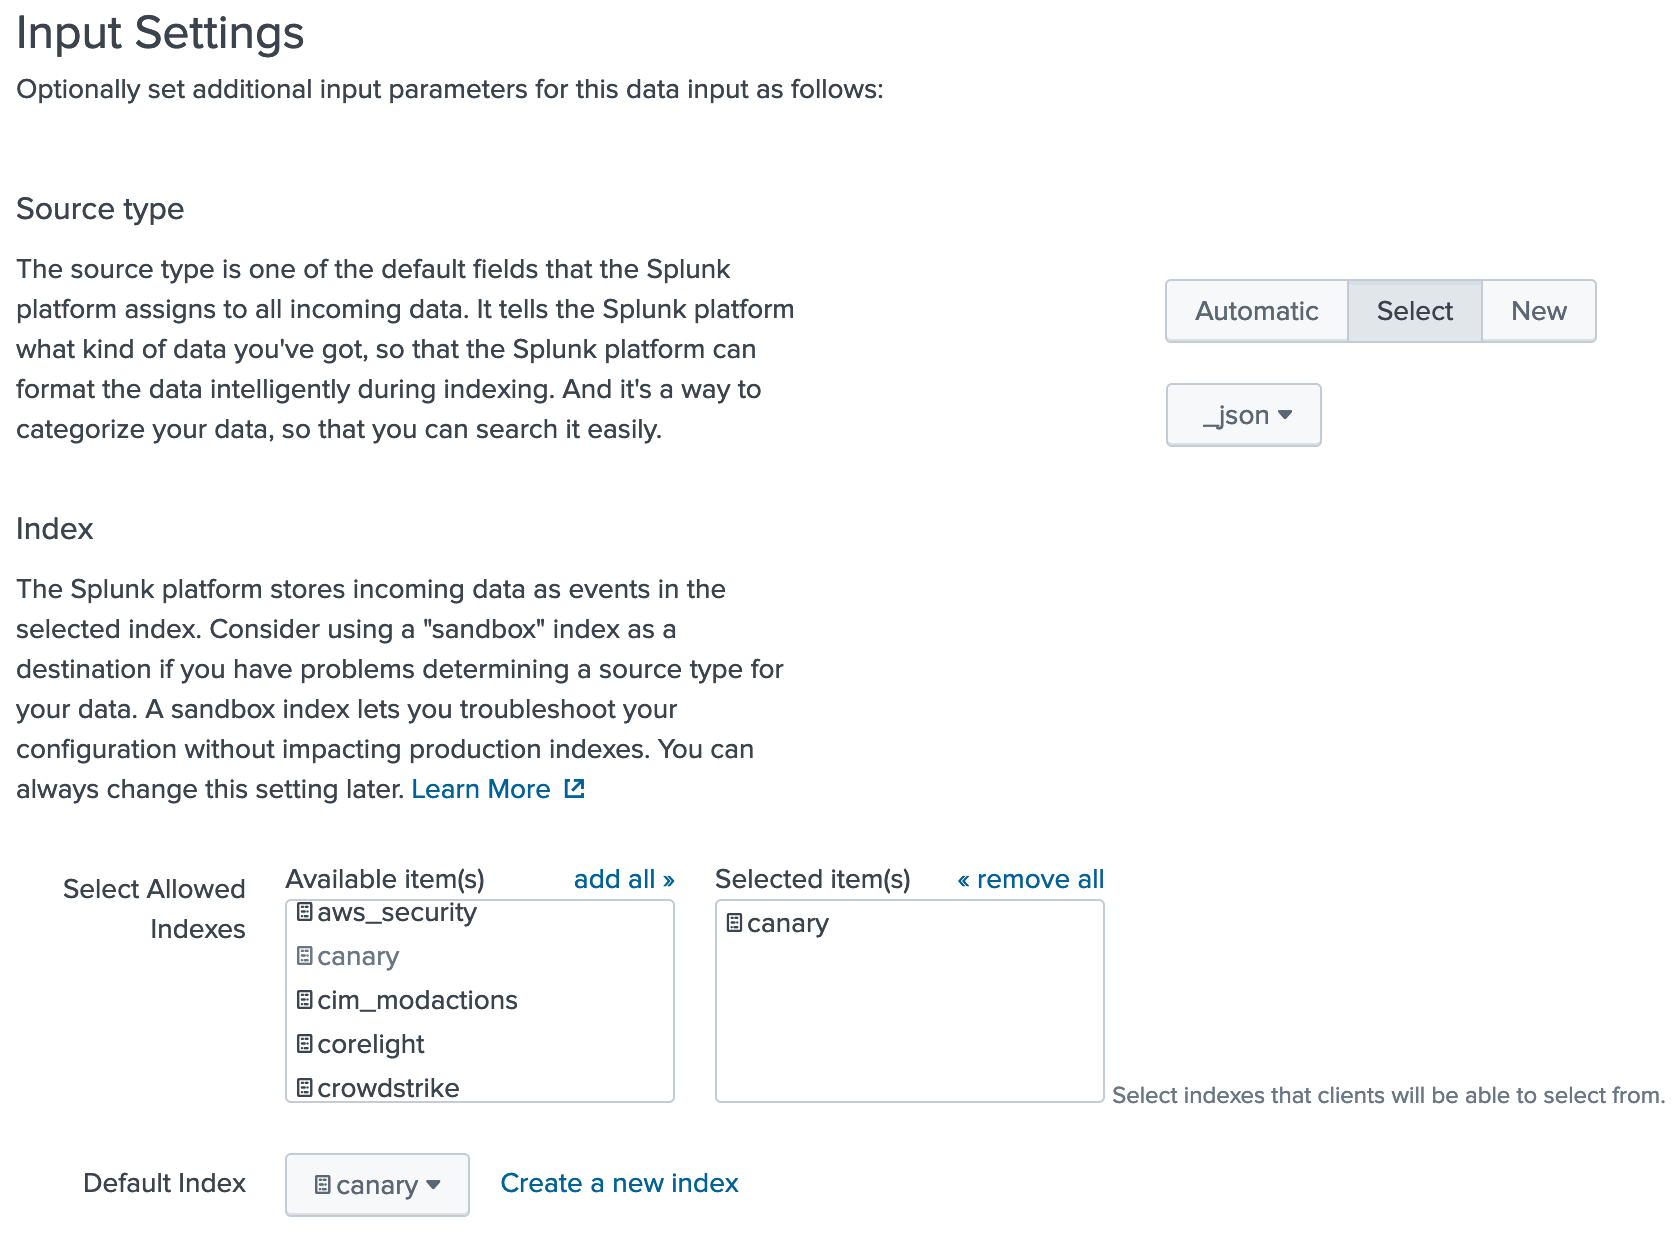 Set sourcetype and index
Click review and then finish the token.
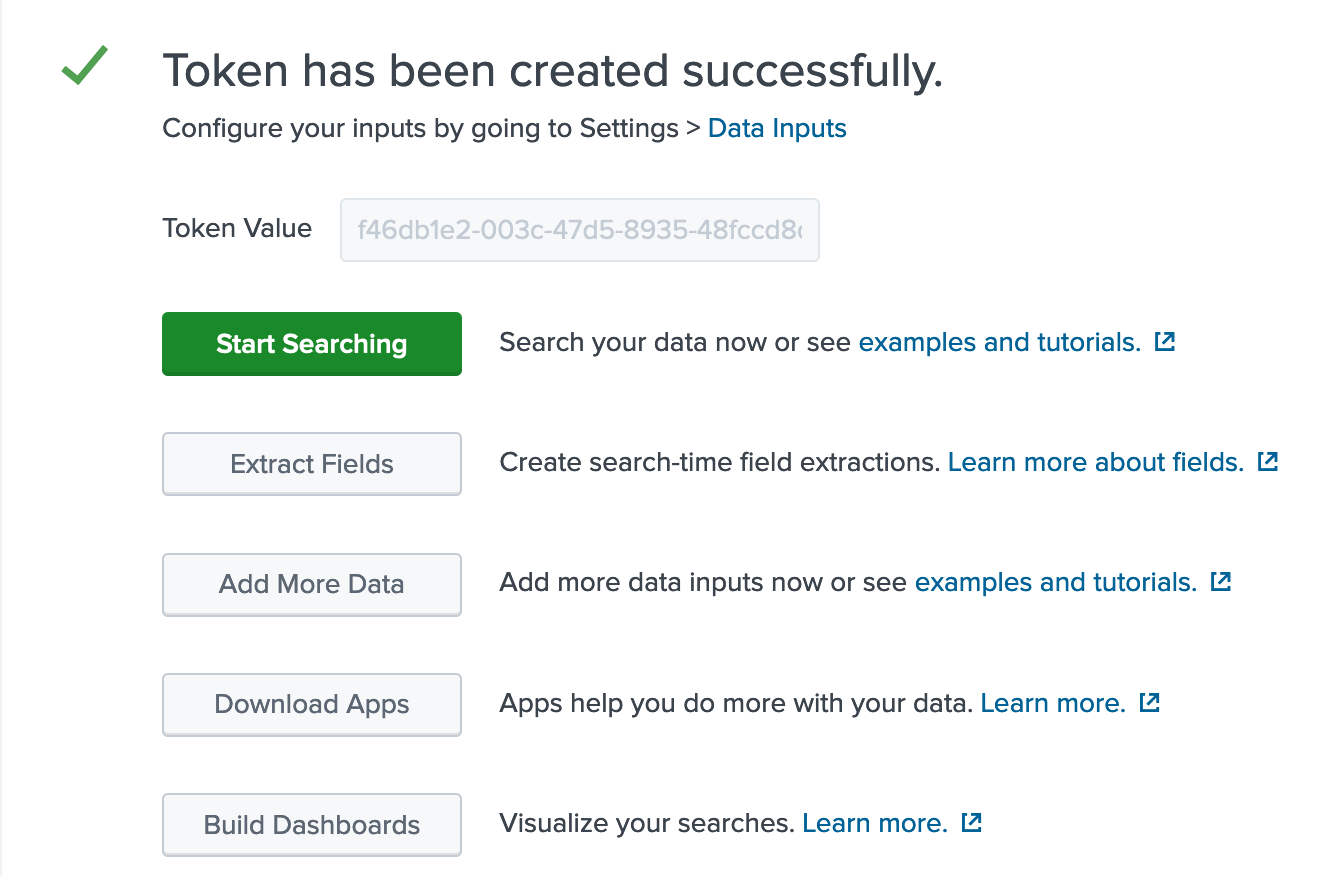 Completed Token
Take note of the token value; we will be using this shortly.
Allow URL authentication
To pass the token value through a URL, we need to set allowQueryStringAuth to true in the configuration file.
If you are a Splunk Cloud Customer, you must open a Splunk Support ticket to set allowQueryStringAuth to true on your HEC endpoint.
The following is an example configuration file that sets this parameter to “true.”
1
2
3
4
5
6
7
8
[http://canarytoken]
disabled = 0
host = splunk
index = canary
indexes = canary
sourcetype = _json
token = xxxxxxxx-xxxx-xxxx-xxxx-xxxxxxxxxxxx
allowQueryStringAuth = true
Create a Canarytoken
Now it is time to navigate to https://canarytokens.org to generate a Canarytoken. For this example, I will create a “Web bug/URL token” to easily demonstrate an alert in Splunk.
The webhook URL will include the Splunk HEC token we created in the previous step. The format for this token will be as follows:
1
protocol://FQDN:port/services/collector/raw?token=token_value
| Environment | Example |
|---|---|
| Cloud | https://http-inputs-<customer>.splunkcloud.com/services/collector/raw?token=xxxxxxxx-xxxx-xxxx-xxxx-xxxxxxxxxxxx |
| On-prem | https://zachthesplunker.com:8088/services/collector/raw?token=xxxxxxxx-xxxx-xxxx-xxxx-xxxxxxxxxxxx |
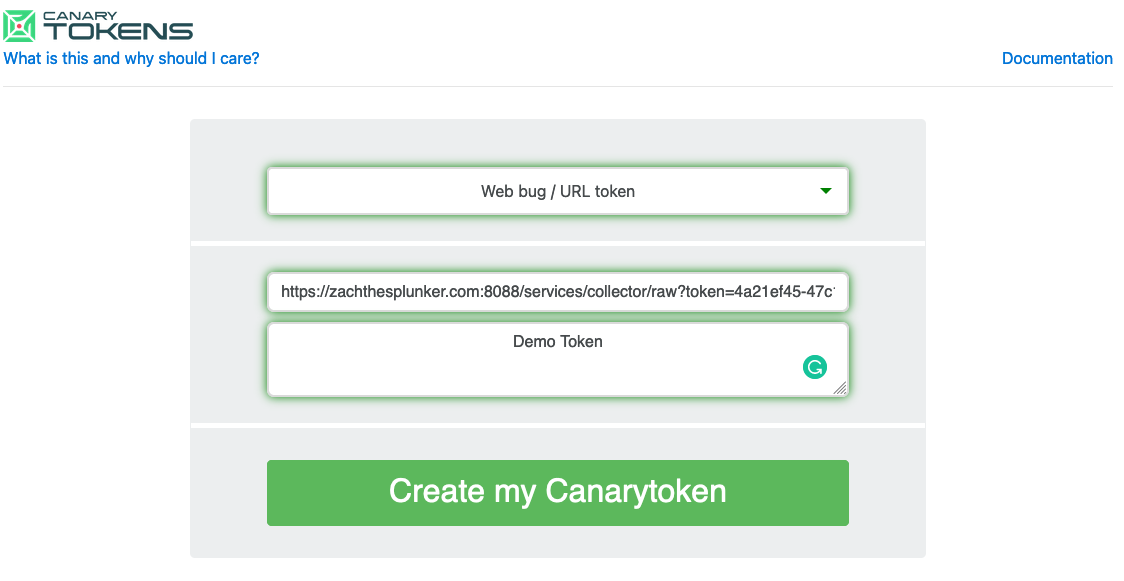 Canarytoken Example
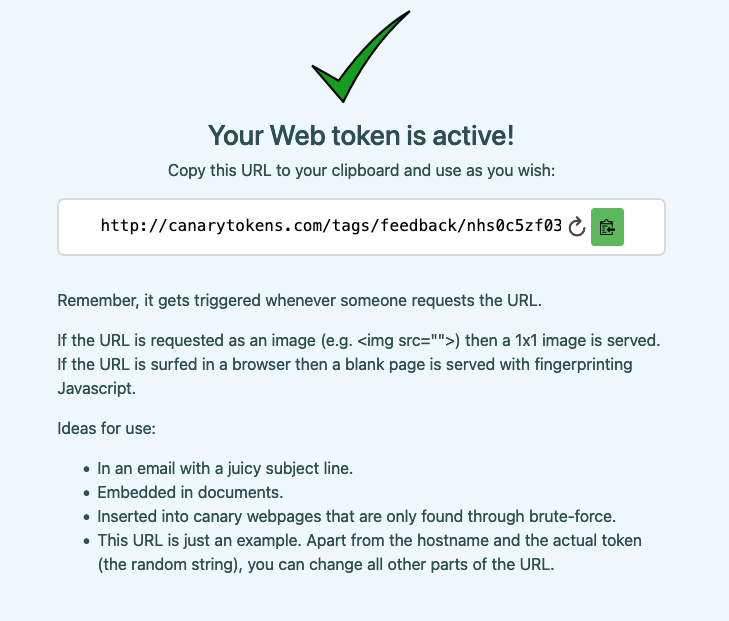
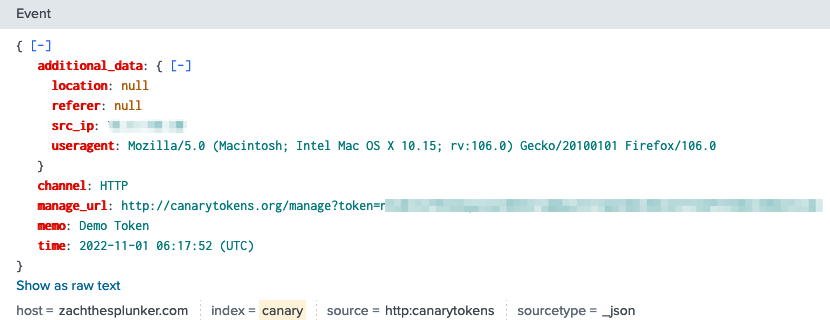
The token is now ready to use. Once the provided URL is visited, I will receive an alert in Splunk!
Security Considerations
There are a few last things to mention in terms of security-related concerns.
- The Splunk HEC may be observed in transit and/or logged in plain text.
- Use HTTPS and give minimal access permissions to the Splunk HEC token.
- If possible, create an allow-list or ACLs to only permit webhooks from Canarytokens.
- Always consult your security team before implementing anything in production.
Conclusion
Canarytokens are another valuable method for catching attackers before they get too far into your network. These tokens could serve as a much-needed warning sign before an attack hits. Combine this with the powerful logging analytics Splunk has to correlate across data sources, and you get increased visibility into your ever-evolving attack surface.